Sunday, January 18, 2015

Nine Hours in Portland, Maine


In addition to being best friends since the dawn of time, my friend Jenelle's husband, Brendan, and my husband, Anthony, also happen to share the same birth month which makes it extremely convenient when planning group birthday adventures :) We've taken them to some fun places (like Atlantic City) in the past, but this year we wanted to do something a little different since we'd be in Kennebunkport, Maine for the New Years holiday. 

Cue Portland, Maine. If you've never been to Portland, I highly recommend making a trip. My family has taking vacations to Maine for over 15 years, and Portland's 'Old Port' is always a highlight of our trips. The cobblestone streets are lined with cool old 19th century buildings, and its waterfront is speckled with fishing piers. In addition to being beautiful to look at, Portland is home of some amazing shopping and restaurant destinations. 

So, Jenelle and I planned for a car to pick the four of us up in Kennebunkport and take us to Portland for the day.

First stop: The Thirsty Pig

Friday, January 9, 2015

Today I Begin a Four Week Detox...

... It started this morning and I've already had to tear myself away from two separate cookie counters.

This should get interesting reallll fast.

You see, I'm not exactly the detox type. Actually, to put it bluntly, I suck at detoxes. I've tried a few different ones - from pure juice cleanses to Dr. Oz's 48-hour weekend cleanse (thanks, Dr. Oz, for teaching me how much I absolutely detest quinoa and chopped prunes for breakfast) - and have failed multiple times.

Keeping all this in mind, when my friend, Jenelle, told me she was doing Transformation One's Four Week Group Cleanse I was incredibly hesitant to pay the $ and jump on board. However, my tight-fitting jeans have left me desperate to find a way to eat healthier, and this plan offered a few perks that I haven't found with other detoxes:
  • First and foremost it's being run by someone who is related to a best friend of mine... meaning that the program can be trusted and I can 100% rely on the moderator as a support system. 
  • Secondly, it's much easier to work out and eat well if you have a support system and others participants who are holding you accountable... That's where the 'group' part comes in. With weekly calls and constant email contact, this cleanse makes it difficult for you to stray from the path of healthy, clean eating. 
  • And finally - the cherry on top of the cake (ughhh I want cake!) - is that you can still eat real food... just in moderation with ingredients that are approved by the program's moderator. 
So, farewell coffee, farewell beloved bourbon, and farewell sugar... You'll be missed, but we shall meet again in four weeks time.

Don't worry, though, I have a couple recipes that I've stored up to post in the coming weeks! Who knows, maybe some healthy ones will be coming your way.

Stay tuned!

xo

Sunday, January 4, 2015

Blue Cheese & Honey Crostini


The 2014 holiday season was filled with countless adventures for the Latinos, many of which I'll be posting about in the coming weeks... Including our fun attempt at cooking live lobster up in Maine (eeeeeeeeeeeeek!)...

In the meantime, here's a delicious EASY recipe that I concocted this week for blue cheese and honey crostini.

One of our adventures last month took us to St. Simon's Island, Georgia - a beautiful little island about an hour from Savannah. My cousin, Cat, and her wonderful fiance, Pete, got married in the area, so we took a little trip down south. It was totally worth it for lots of different reasons.

Of course, the best part was getting to hang out with my family in an awesome, new place...

All the cousins (nine girls and one boy!) and our grandfather (bride is on my grandfather's right)

Another great part was all the authentic southern food. Pretty much everything is deep fried...We're talking chicken, pickles, crab cakes, sweet potato fries, and lots more.

But, believe it or not, one of my favorite food items from the trip wasn't fried... what could it be? Savannah Bee Company's honey for cheese... YUM!


SO good!

This recipe for crostini will literally take you all of 10 minutes. First preheat your oven to 350 degrees. Then, slice off 24 quarter-inch pieces of Italian bread and place them on a baking sheet...


Bake them for eight minutes, turning them over after four minutes, until they look all pretty and golden-brown...


Cut the blue cheese into inch cubes, and top each piece of bread with a piece...


Then, using a butter knife, drizzle honey over each crostini...


Place on a pretty plate (like this slate cheese board... love this thing!) and there you have it... told you they were easy!


Blue Cheese & Honey Crostini

INGREDIENTS
Makes 24 crostini 

1 loaf of skinny white Italian bread
1/2 lb blue (or Stilton) cheese
1/4 cup honey (cheese honey is preferable, which can be found at local cheese shops) 

DIRECTIONS
  1. Preheat oven to 350 degrees
  2. Cut 24 pieces of quarter-inch-thick slices of bread and place on baking sheet. Bake at 350 degrees for eight minutes, turning halfway through to crisp on both sides. 
  3. When bread is finished, cut (or break) blue cheese into inch-thick cubes. Top each piece of bread with one piece of cheese. 
  4. Take a butter knife and dip into honey, then drizzle over each piece of crostini to taste. 
  5. Serve and enjoy! 


Sunday, December 14, 2014

Mini Chicken & Waffles


These mini chicken and waffles were an absolute hit at our annual holiday party last night (the iPhone pics don't really do them justice)... The chicken was crunchy and flavorful, and the waffles were buttery and delicious.

The recipe comes from one of my favorite lifestyle websites, PureWow. They send their newsletters weekly, and they're filled with fun tips for everything from cooking and fashion, to home and travel. Sign up. You won't regret it!

The full recipe for the chicken and waffles can be found here... We used the PureWow recipe for the chicken, but actually went with a different recipe for the waffles. This recipe from Taste of Home for Belgian waffles is our house favorite (a-m-a-z-i-n-g), and I couldn't bring myself to try a different one.

The yummy vehicle for the chicken

Deep-fried goodness

Since we didn't want to deep fry during the party (who wants oil all over their outfit? not this girl.), we made the chicken and waffles ahead of time, and then toasted them in the oven a bit before everyone arrived so they were warm. Just be sure to put the chicken and waffles on a cooling rack and allow them to completely come to room temperature before setting aside... otherwise it'll all get soggy!

Serve with a side of syrup and you got yourself some fancy schmancy finger food!

Here's the recipe for both, enjoy!

2014 group shot!

Mini Chicken and Waffles
via PureWow & tasteofhome.com

INGREDIENTS
Makes about 24 pieces

For the chicken
Canola or peanut oil for frying
1 1/4 cups all purpose flour
2 tbs cornstarch
1 teaspoon cayenne pepper
1 tbs dried Italian herb seasoning
2 tsp salt
1 teaspoon freshly ground black pepper
1 cup buttermilk
1 1/2 lbs chicken tenders, cut into bite-sized pieces

For the waffles
2 cups all-purpose flour
3/4 cup sugar
3 1/2 tsp baking powder 
2 eggs, separated 
1 1/2 cups milk
1 cup butter, melted
1 tsp vanilla extract
Syrup for serving

DIRECTIONS

  1. In a deep, medium-size pot, heat about 3 inches of oil over medium heat until it reads 350°F on a thermometer
  2. While the oil heats, make the waffles. In a bowl, combine flour, sugar and baking powder. In another bowl, lightly beat egg yolks. Add milk, butter and vanilla; mix well. Stir into dry ingredients just until combined. Beat egg whites until stiff peaks form; fold into batter. Bake in a preheated waffle iron according to manufacturer's directions until golden brown. Let the waffles cool slightly, then cut them into bite-size (about 1-inch) squares and place them in a 250°F oven to keep warm.
  3. Make the fried chicken: In a medium bowl, whisk the flour with the cornstarch, cayenne pepper, Italian herb seasoning, salt and black pepper to combine. Pour the buttermilk into a shallow, medium-size bowl.
  4. Toss the chicken pieces in the flour mixture to coat. Working in batches, dip the floured chicken into the buttermilk, then return it to the flour and toss to coat.
  5. Working in batches, add the breaded chicken to the hot frying oil. Don’t overfill the pot with chicken, as it will bring down the temperature of the oil. Fry until the chicken is golden brown and floats on the surface of the oil, 3 to 4 minutes. Adjust the heat as needed if the chicken is browning too quickly.
  6. Remove the chicken from the oil and drain on several layers of absorbent paper towels. Let cool slightly, then place a piece of chicken on top of a waffle square and secure with a toothpick. Serve immediately with syrup on the side.

Thursday, December 11, 2014

My Adventures with Annie Sloan

Soooooo I have a new DIY obsession... My wonderfully creative mother introduced me to a line of chalk furniture paint by Annie Sloan.

You see, it all began when my hubby and I had a spot in our apartment that desperately needed some sort of sitting set-up. We happened to stumble upon these horrible-looking chairs (they literally had gold pumpkins painted on them) and figured what the heck, let's see if we can fix 'em up.

Here's the before shot:


Horrifying, right? 

So we took them to my parents house because I figured my mom would be able to help us work some magic. She's painted a whole host of furniture pieces with Annie Sloan's paint (it's become a slight addiction... I can now understand why) and has become quite the expert. 

We picked a soft, neutral color called 'Old Ochre' which we painted the chairs with first. Since they were black originally, it took three coats to completely cover the existing finish. 

The Old Ochre color swatch

Now here's the fun part... Annie Sloan has waxes that you can use to spice up your project. There are endless options as to what you can do with the wax, and it comes in a couple different colors. The most basic is the clear wax which gives the chalky paint a soft, but shiny finish. I chose the more non-conventional option, the dark wax, which makes your piece look a little more aged and adds some fun texture.

Here's a basic video tutorial that shows the technique: 


In the video, they're a little more aggressive with the dark wax... I chose to use less because I didn't want it to look too antique-y.

Here's the finished product! If you look closely you can see the streaks of dark wax on the seat and in the crevices of the wood. 


If you're going to take on a project like this, I also suggest investing in some of Annie Sloan's brushes. They make a huge difference. 

And here are the chairs all set up in our new space:


Tada... I just love it! I have a feeling there will be many more furniture painting projects in our future.

To find a store that sells Annie Sloan paint near you, click here

Happy crafting!


Monday, November 10, 2014

Sausage and Pepper Puff Pastry Cups


Can you believe that it's already November?! I literally switched on my TV the day after Halloween and the first commercial that popped up was for holiday shopping. Seems like the norm by now... which got me thinking that I need to start planning out my holiday shopping strategy... eeeeeeeek...

Anyway, one of my favorite parts of the holiday season is the annual Christmas party that my partner in crime, Jenelle, and I throw each year. You see, it started three years back when we got our first apartment in Hoboken... Theme of 2011: ugly sweaters, clearly.


Then in 2012, we ditched the ugly sweater theme, but still had just as much wonderful, immature fun as we did the previous year...


And in 2013 we upgraded our location to Anthony and my (larger) apartment followed by some late night fun at a local bar... which is where this photo was taken:


This year the event will be held at Anthony and my apartment again, but there is yet another (exciting) change. Rather then the 'Jenelle and Liz Christmas Party' it'll be the 'Wilson and Latino Christmas Party' now that Jenelle and Brendan have tied the knot. The boys will not be attempting any cooking... we've given them the important responsibility of securing the booze.

At each party we have lots of food, and in an effort to get rockin' and rollin' I've started pulling together some fun, new recipes.

First up: Sausage and Pepper Puff Pastry Cups!

Not only are they delicious, but the red and green peppers make them a little festive too.

We started by finely dicing some onions, peppers, and garlic. It's important to finely dice them cause otherwise you'll have trouble putting them in the little cups later on...


See, teeeeeny tiny like this...


Then we take the casing off of 1.5lbs of sweet (or spicy if you're feeling adventurous) Italian sausage...


After removing the casings, add it to a hot sauté pan with two tablespoons of heated olive oil...


Cook the sausage for a little while until it's brown and glorious like so, breaking it up into small bits as you cook it...


Take your sausage bits out of the pan with a slotted spoon. You're going to be left with a sausage fat / olive oil mixture that looks like this...


Drain all of the fat, except for two tablespoons. Then add your peppers, onions, and garlic to the pan...


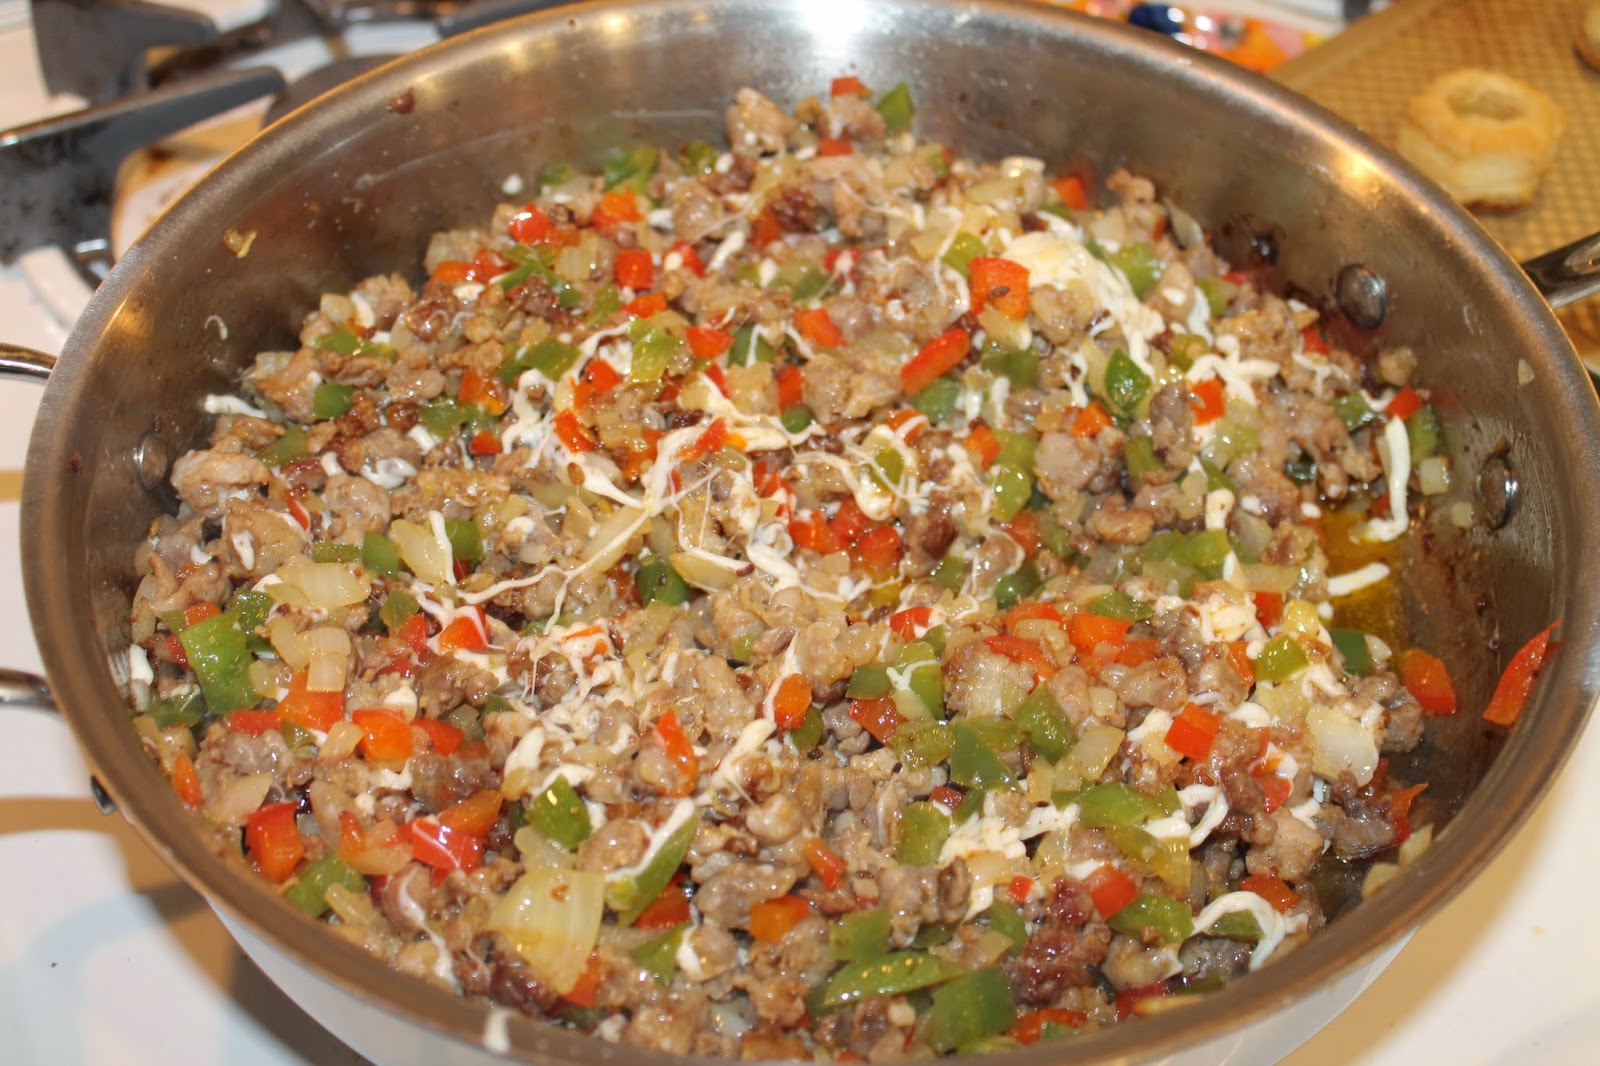
Once the veggies are nice and tender, add your sausage back in, as well as 1/2 cup of shredded mozzarella cheese...


When your pastry cups are 3/4 way done, take them out of the oven and stuff them with the sausage mixture (I try to get a nice bit of pepper, onion, sausage and cheese into each one). Then sprinkle a little bit of fairy dust (aka Parmesan cheese) on top and put them back into the oven to finish cooking...


And there you have it! A savory, festive, holiday treat!


Let me know what you think!

P.S. - PLEASE NOTE that this recipe makes 48 pastry cups... Enough for a whole party! If you're looking to make less, just half it.

P.P.S. - Love the candle holders in the first picture? Check out Ikea for their holiday decorations! They have some really wonderful things for incredibly low prices (I always walk in their meaning to buy one thing, and then walk out with so much stuff we don't need... but love!)

Sausage and Pepper Puff Pastry Cups

INGREDIENTS
Makes 48 puff pastry cups

48 Frozen Puff Pastry Cups (I used Pepperidge Farms)
1.5lbs sweet or spicy Italian sausage, casing removed
1 cup red bell pepper, finely diced
1 cup green bell pepper, finely diced
1 cup yellow onion, finely diced
3 garlic cloves, minced
2 tablespoons olive oil
1/2 cup shredded mozzarella
1/4 cup grated parmesan cheese
Salt and Pepper

DIRECTIONS

  1. Start out by cooking your puff pastry cups so they're 3/4 the way done and remove from oven (for example, the Pepperidge Farms cups are supposed to be baked for 20 minutes, so bake them for 15 minutes and take them out). 
  2. Heat your olive oil over medium-low heat in a large sauté pan. When the oil is hot, add the sausage and stir occasionally until sausage is cooked through and golden brown. Break up the sausage into little bits as it cooks (see photo above). 
  3. Remove sausage from pan using a slotted spoon, and transfer to a bowl. Reserve two tablespoons of the oil / sausage fat and drain the rest. Return sauté pan to medium-low heat and add the two tablespoons of reserved oil / sausage fat. 
  4. Add the peppers, onions, and garlic to the pan, stirring occasionally for approximately 10 minutes or until the vegetables are tender. 
  5. Once vegetables are tender, add the sausage back to the pan. Sprinkle salt and pepper over the mixture (to taste), and remove pan from the heat. Stir in mozzarella cheese. 
  6. Using a small spoon, divide the mixture among the pastry cups (try and get some sausage, peppers, onions, and cheese in each!) and sprinkle each cup with a dash of parmesan cheese. Return cups to the oven and bake for remaining amount of time (for example, five minutes for the Pepperidge Farms cups). 
  7. When time is up, remove from oven, serve and enjoy! 

Monday, November 3, 2014

BetasBasics on Etsy!

I'm very excited to announce the launch of a little Etsy shop called BetasBasics!

Last year I made these (pretty adorable) glasses for my wedding which ended up being a perfect prop for our morning photos...


And then this year, a friend asked me to make another set for her best friend's wedding... 


Each glass has a pretty little dress hand-painted on it (in your wedding colors of course!), and the date on the back...


Then I hand paint initials / names / letters on the base...


Fun, huh?

You can order champagne flutes, wine glasses, beer mugs, shot glasses and high ball glasses. And these glasses aren't limited to the ladies! There are fun little tuxedo glasses for the dudes, too...


BetasBasics also sells fun items like wedding card holders...


So check it out... And feel free to share with any future brides or grooms!